 Confession time … sometimes I find it really hard to get my head around new tech processes. At the beginning of my Enterprise by Design journey I kept hearing how important it was to create a sales funnel. Most funnels begin with collecting your prospects email address in exchange for something – this may be an eBook, access to a video, a free course or member specials. This is often called a lead or an opt-in or even a freebie or freemium (although they are not really truly free if you pay with your email address!).
Whatever your offer, you will need to create a page which will ‘capture’ your prospects attention & entice them to supply their email address in return for your give-away. This might be a link from social media which goes straight to your offer (landing page) or it may be attached to an article you have read which leads into your offer.
When you are first starting to build your list of prospects you may not have the budget to commit to lead generation software such as Leadpages which starts at over • $100USD per quarter, unbounce which starts at • $49USD per month or optin monster starting at • $49USD per year.
But if you have a wordpress site & you are a member of elegant themes, you will, by default, have access to the BLOOM Plugin.
how to use bloom
So let’s have a look at how we use Bloom to make an opt-in. Once you’ve made your ♥ purchased & set up your Elegant Themes account, log-in & click on the themes link at the top left of the main content window. The second link down is ♥ Bloom. You have 3 options – the download, preview & documentation. I suggest you click into the preview & have a look at the different types of forms to you can decide which ones you use.
Go back & download your ♥ Bloom plugin. Login to your wordpress site & install & activate Bloom. If you’re unsure how to do this just watch our video tute.
The BLOOM plugin has 6 different display types …
 Automatic Opt-in pop-up look like this
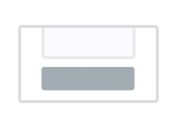 Below Content forms look like this (you’ll need to scroll to the bottom of the article)
 Automatic Opt-In fly-ins look like this
 Widget Area Opt-in forms: you can create as many widgets as you like & pop them in any widget ready area of your site
decide which form(s) you will use
Okay so now it’s time to decide which style of optin you want to set up …
- I have a number on forms on this site &, although it is important that I capture my potential tribe members email addresses, I don’t want to annoy returning users so I tend to tread a bit softly. I have a pop-up on my first page but I’ve set it so it only comes up once per session. I want my peeps to see my forms & take action – that action is not to leave my site because I’ve driven them crazy with distracting pop-ups.
- Because I’m building my article base, I have added below content opt-ins to the bottom of each post, on the basis that peeps will find the content so useful they will want to know when I put new posts up. On very long posts I’ve also got inline opt-ins.
- Finally I use unlock forms where I am offering content in exchange for their email addresses.
step 1: connect your email account
- In the navigation tools (left side of the screen), find the Bloom fly-out & click on email accounts
- Click on the big green button <NEW ACCOUNT>
- Choose your email provider from one of the many options
- Mail Chimp
- Aweber
- Constant Contact
- Campaign Monitor
- Mad Mimi
- iContact
- GetResponse
- Sendinblue
- Mailpoet (a great newsletter plugin which I use)
- Ontraport
- Feedblitz
- infusionsoft
- Hubspot
- SalesForce
- Active Campaign
- Emma
4. Depending on what email provider you use, you will need to fill in other details such as your account name & API key. If you are using give you account a name & Mailpoet it will pick up the lists you have already set up. Then you just need to click on authorise.
5. Save & Exit
make your first form …
Now comes the fun part … be sure to have your style manual with you so you can match your optin to your branding.
- Back in the navigation pane, look for opt-in forms (just above the email accounts button).
- Click the big green button <NEW OPTIN>
- Lets work on a popup form which can be on the main page of your site, select pop up.
- Give your optin a name – I like to be very logical in my naming the style of the optin then the location, so I’ll call my optin popup_home
- Select your form integration
- Click on NEXT: DESIGN YOUR OPTIN
- Choose a template out of the 80 or so suggestions
- Click NEXT: CUSTOMISE
- Time to configure the content, layout & styling. You can go crazy here but keep in mind the purpose of your form & make sure you work with the fonts, imagery, voice or language & colours of your branding. Click on the little blue eye icon to view your form at any stage.
- Click NEXT: DISPLAY SETTINGS
- This is where you will define when & where the optin will display. When making these decisions remember to keep your prospect in mind. Don’t annoy them or you may loose them from your site rather than having them sign-up. THere are lots of options, personally I like the more subtle ones like fade in animation rather than bounce or tada, but that is the way I want to be perceived – not too pushy! Think about when you want the popup to activate – when the user first gets to your site, after a time deal (how long is reasonable) trigger at the end of a post? You can also decide where to dispaly it or to display on certain categories. When your done, check the preview one final time (the blue eye icon) &
- Click SAVE & EXIT.
- You’re done, keep an eye on your statistics for your optin, you may want to change & add your display options.
- If you are planning on having a number of optin forms on a single site, I strongly suggest you document each optin, the type & the triggers so you don’t end up with a merry circus.
- Have fun, if you find any errors in this tutorial, please comment below. I have tried to be as clear as possible but, well, I’m only human after all!
- Any prices quoted are current at time article was written.

 Inline Opt-In forms look
 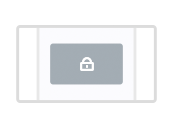 require opt-in to unlock content looks




Thank you Jinny fabulous information. You should be charging for this? Just wondered if there is any way to make the opt in automatically show my email address when I type it in. Being lazy an’ all!! Just like it did below when I put my email address in!1
This font is very light on my apple mac. Can hardly see it!!
Hi Rosie,
I’m glad you found the instructions useful. Thank-you for your suggestion that I should be charging … watch this space!
Regarding your email inputting automatically – do you mean into my optin form? Hmm, I don’t think so but I’ll let you know if I find a way.
Interesting that my text is hard to read – it is almost black … but I’ll double check it … for my interest what Mac do you have & what browser?
thanks again Rosie,
have a BLOOMin good time!